
Which Shopify Products Should You Scan First for Interactive 3D?
A practical way to choose the first Shopify products worth turning into interactive 3D models with a phone.
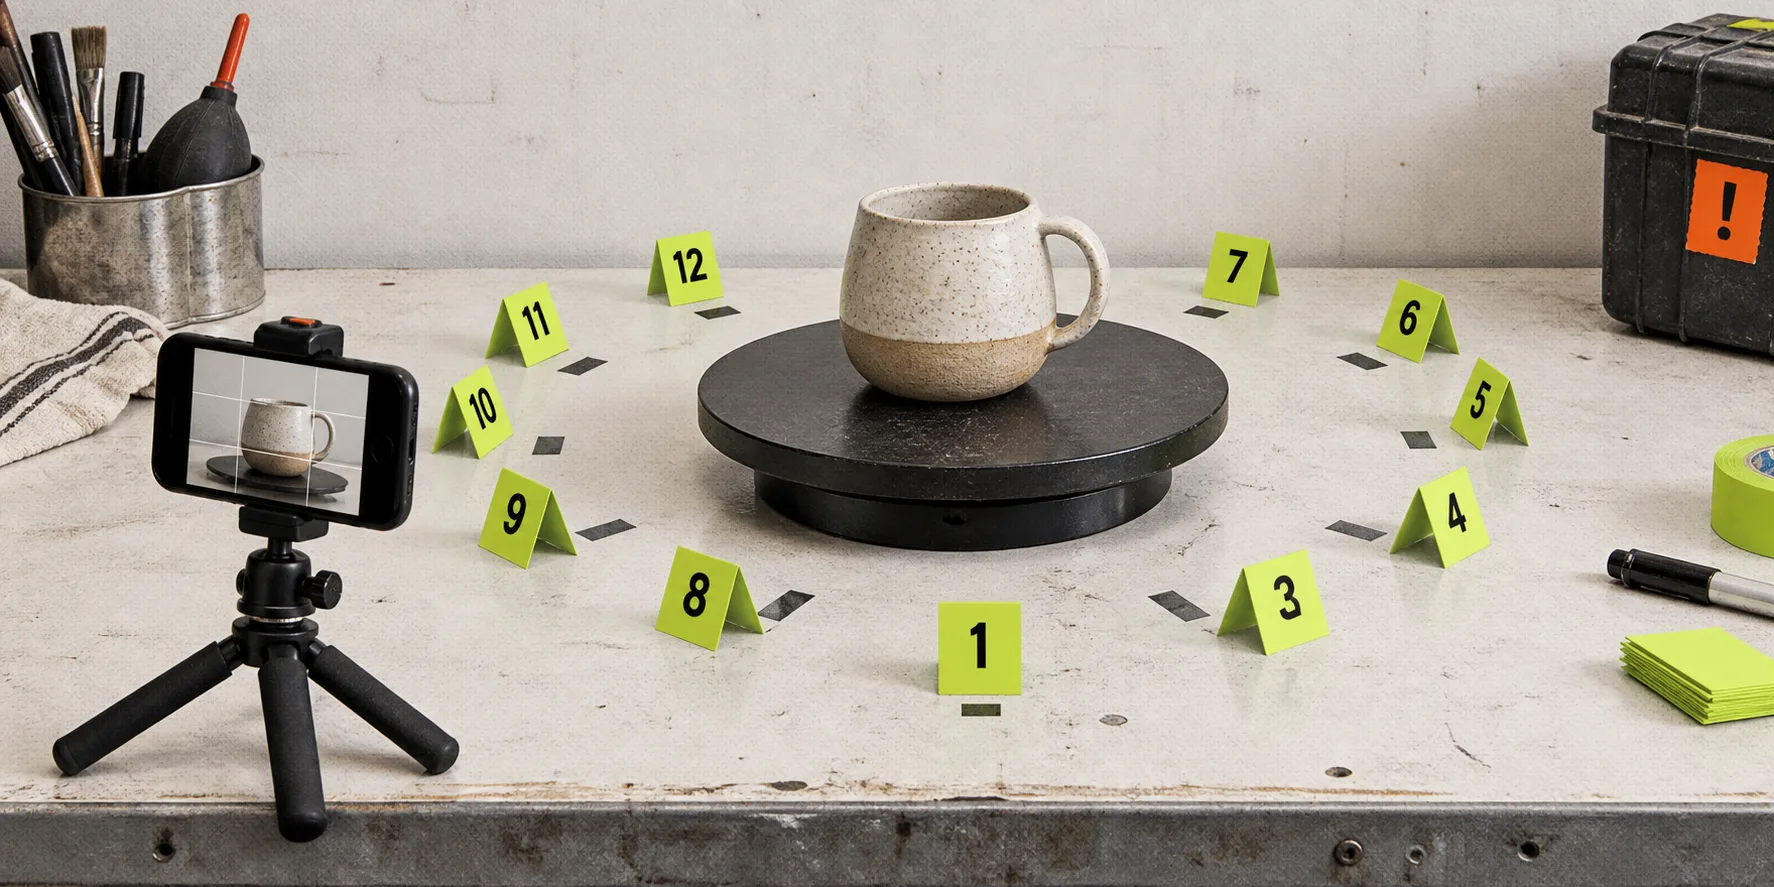
Start With the Product Page That Explains Too Little
The first product you turn into an interactive 3D model should not be the one with the most impressive silhouette. It should be the one whose existing product page leaves the most questions unanswered. If customers need to understand thickness, scale, closure details, texture, or what the object looks like from the side, flat photos have a predictable blind spot.
That makes 3D product media a practical merchandising choice, not a novelty project. With Supra 3D Capture, a merchant can take a guided orbit of phone photos, turn it into a web-ready GLB, and publish it to Shopify product media or an Online Store 2.0 app block. The sensible first move is to pick a SKU where that extra inspection changes a shopper’s confidence.
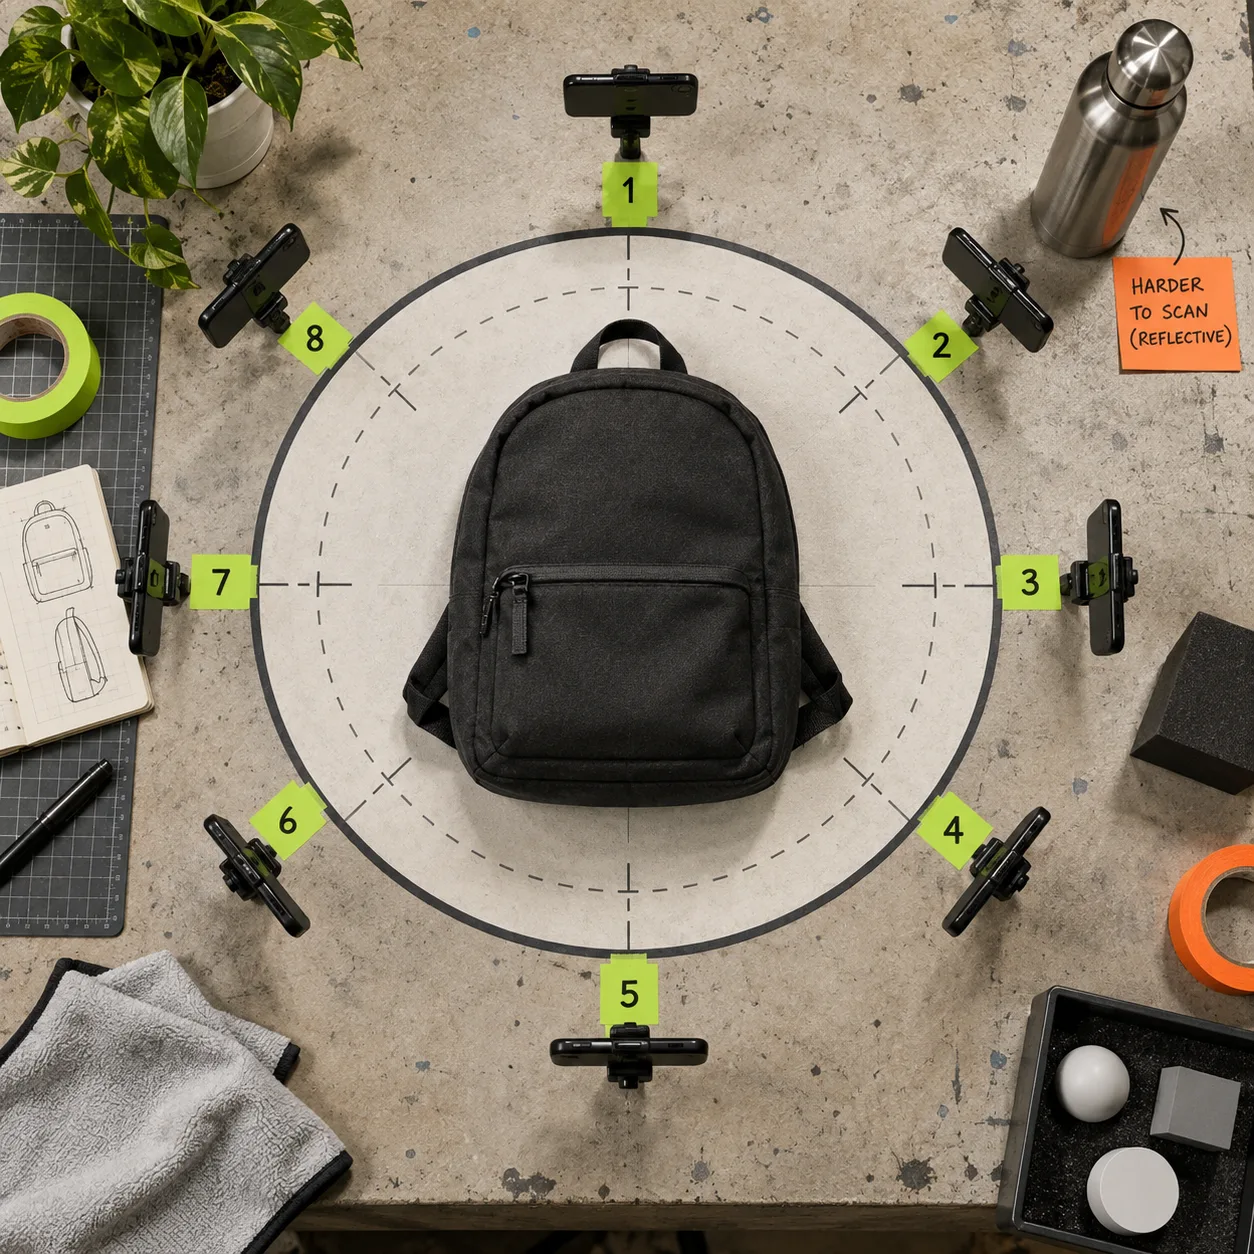
Use a Simple Four-Part Test
I would score candidate products against four questions before charging a phone or clearing a table.
- Does shape matter to the buying decision? Bags, footwear, home objects, small appliances, furniture accents, and tactile accessories are strong candidates. A front, back, and side photo can still leave a shopper guessing about depth or proportions.
- Do support questions expose an expectation gap? Look for questions such as “How large is it really?”, “What does the clasp look like?”, or “Can I see the side?” A 3D model is useful when it answers a recurring question without adding another paragraph to the description.
- Can the item be captured cleanly? Start with an opaque, matte or gently textured product in good condition. Clear, mirror-like, very dark, hairy, or highly reflective items can be harder for photogrammetry because their visible features shift between photos. They are not impossible, but they should not be the first production test.
- Will the model be reused? A hero SKU, a perennial bestseller, or a product with several campaigns ahead of it gives you more chances to benefit from the work. Avoid treating a short-lived clearance item as your first proof of concept.
This is the same product-page thinking behind choosing Shopify SKUs for phone-captured 3D models: choose an item where a customer-led inspection has a clear job to do.
Good First Candidates
A structured bag is often a useful first scan. It has edges, hardware, seams, volume, and a usefully understandable shape. A compact speaker, ceramic mug, sandal, or desk accessory can also work well because shoppers naturally want to rotate them. These are objects where the item itself is the story.
A good candidate is not necessarily expensive. It is simply a product whose physical form matters more than an extra lifestyle photo. That distinction prevents a common mistake: adding 3D to an item whose main sales challenge is color choice, fit guidance, or price.
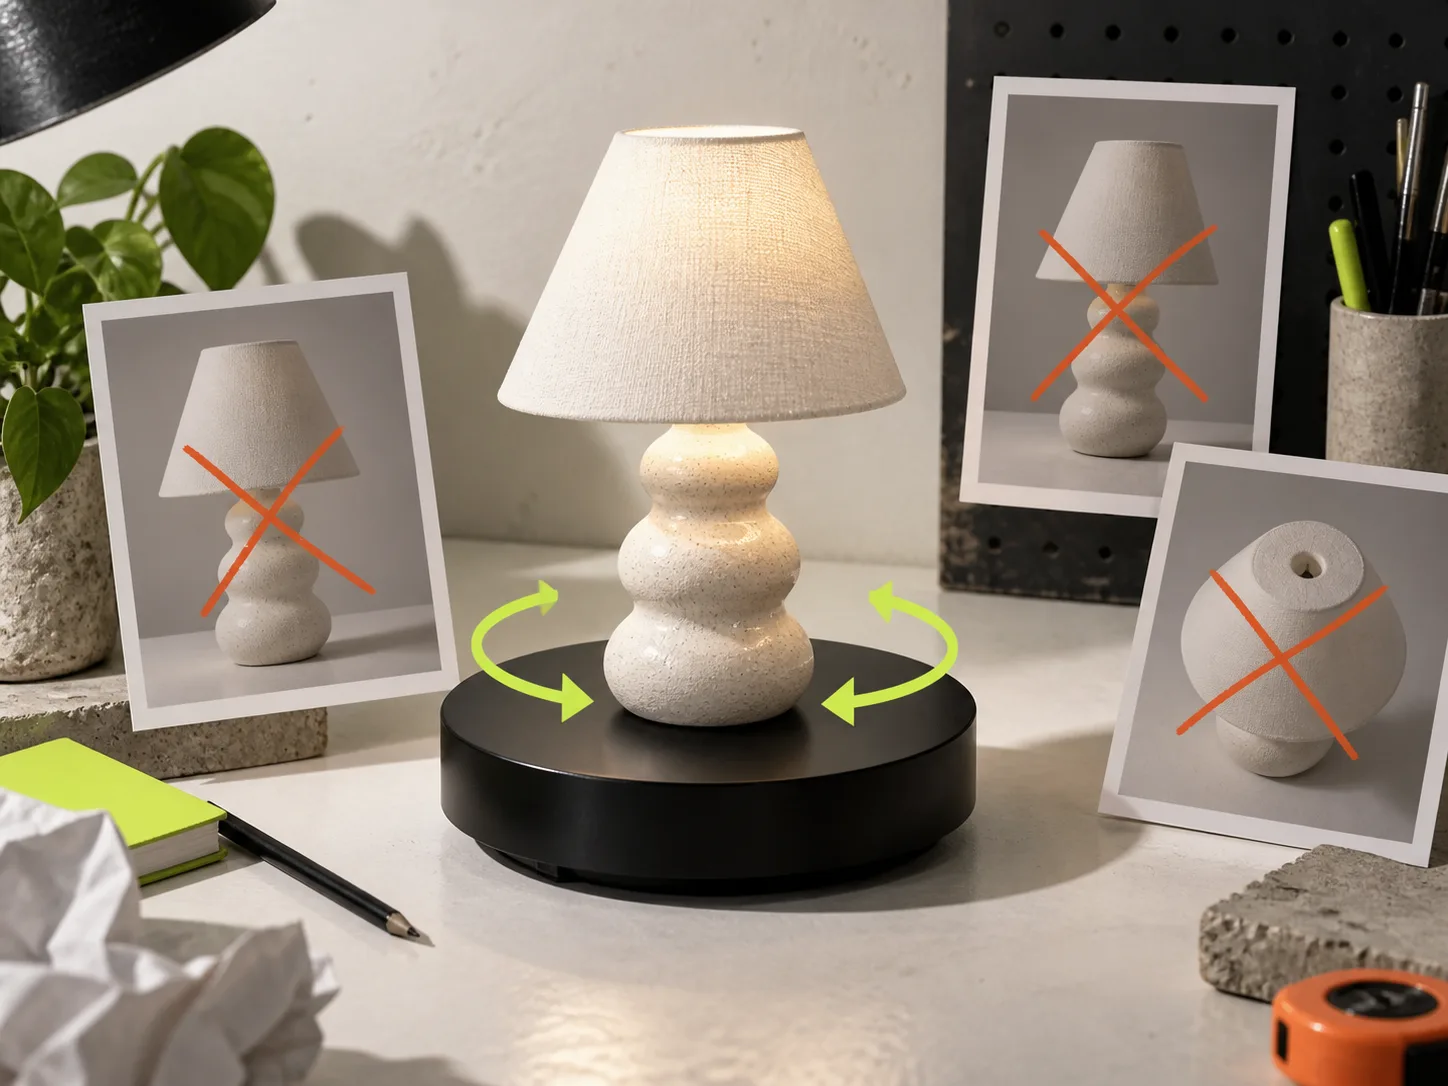
Products to Leave for Later
Save the difficult cases until the capture routine is boring. Highly polished metal, glass, transparent bottles, fuzzy textiles, very thin items, and products with moving parts can demand more preparation. So can a large product that needs a consistent backdrop and enough room to walk around it.
That is not a reason to avoid the category forever. It is a reason to establish a baseline first: neutral light, a stable product, a clear orbit, and a quick review of the result in Shopify’s native viewer. Once that workflow is repeatable, you can test more challenging surfaces without confusing a capture problem for a platform problem.
Run a Small Capture Preflight
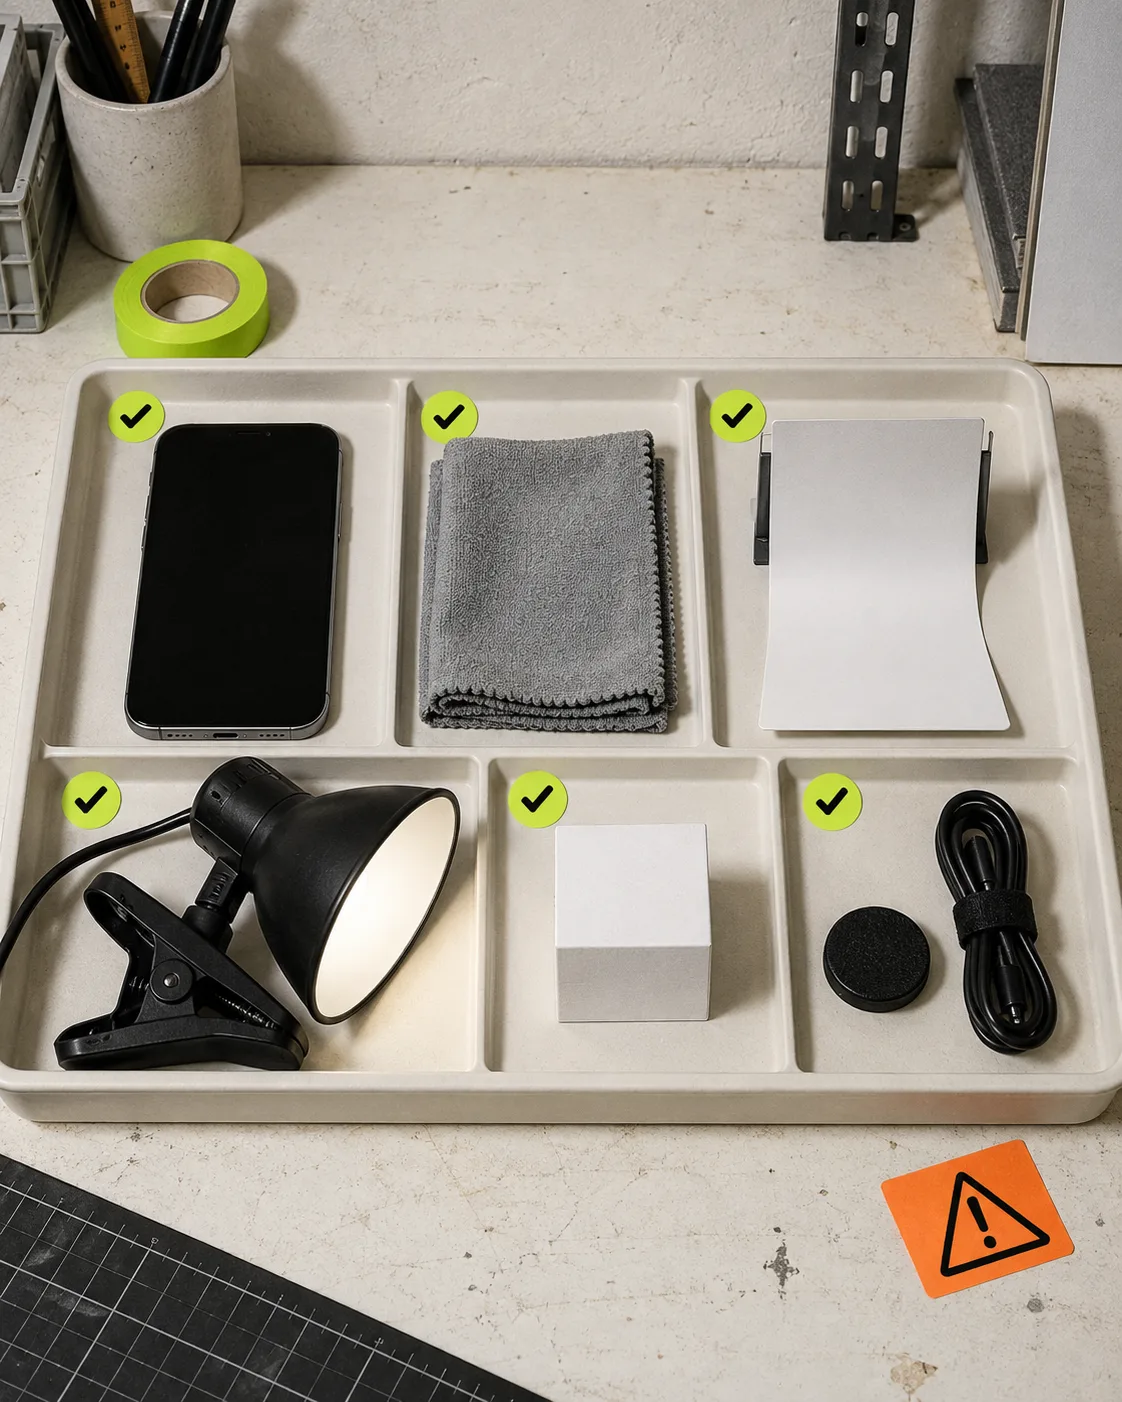
Before starting the guided capture, clean the item and remove visual distractions. Use even light; harsh specular highlights and deep moving shadows make every photo less consistent. Leave the product in one place, keep the background simple, and make sure the item is fully visible from every useful angle.
Supra 3D Capture is built around a guided phone-photo workflow, so you do not need LiDAR or specialist modeling skills to begin. The work is still physical: a product that is clean, still, and evenly lit gives the reconstruction process better material to work with.
Publish Where Shoppers Will Actually Use It
Do not bury the finished model after the image gallery. Attach the GLB to the relevant Shopify product media and check how it appears in the theme’s native 3D viewer. If the product story benefits from context, use the dedicated theme app block near the detail that created the question in the first place: material, construction, size, or a feature callout.
Then watch a narrow set of signals: product-page questions, time spent with the media, return reasons, and qualitative feedback from customer support. The goal is not to promise an automatic conversion lift. It is to close an avoidable expectation gap and make a product page feel more inspectable.
For a broader readiness pass, pair this with a Shopify interactive-3D audit before a collection launch.
Make the First Scan a Useful One
Choose one SKU with visible form, a recurring customer question, and a long enough shelf life to justify improving the page. Capture it in calm, repeatable conditions, publish it where customers can rotate it, and learn from that single page before expanding the program.
The fastest way to make 3D feel achievable is to treat it like a product-media test. Pick the one product that deserves a closer look, then start a guided capture with Supra 3D Capture.