<?xml version="1.0" encoding="utf-8"?><feed xmlns="http://www.w3.org/2005/Atom" xml:lang="en"><generator uri="https://jekyllrb.com/" version="3.10.0">Jekyll</generator><link href="https://tools-and-how-tos.github.io/feed.xml" rel="self" type="application/atom+xml" /><link href="https://tools-and-how-tos.github.io/" rel="alternate" type="text/html" hreflang="en" /><updated>2026-09-09T02:32:55+00:00</updated><id>https://tools-and-how-tos.github.io/feed.xml</id><title type="html">Tools and How Tos</title><subtitle>Clear reviews, useful online tools, and practical how-to guides.</subtitle><author><name>Tools and How Tos</name></author><entry><title type="html">How to Build an Approval-Ready AI Video Workflow With VideoJSON</title><link href="https://tools-and-how-tos.github.io/2026/09/09/how-to-build-an-approval-ready-ai-video-workflow-with-videojson/" rel="alternate" type="text/html" title="How to Build an Approval-Ready AI Video Workflow With VideoJSON" /><published>2026-09-09T02:32:21+00:00</published><updated>2026-09-09T02:32:21+00:00</updated><id>https://tools-and-how-tos.github.io/2026/09/09/how-to-build-an-approval-ready-ai-video-workflow-with-videojson</id><content type="html" xml:base="https://tools-and-how-tos.github.io/2026/09/09/how-to-build-an-approval-ready-ai-video-workflow-with-videojson/"><![CDATA[<p>AI video is easy to generate right up to the moment somebody asks, ‘Can I change the caption, swap the product image, and approve this before it renders?’ If the answer is a pile of clips and a one-off prompt, you do not have a workflow yet. You have a fast way to create review debt.</p>

<p><a href="https://videoflow.dev/">VideoFlow</a> is a practical fit when the job is repeatable: turn a brief or an AI response into structured video data, inspect it in a live preview, let a human adjust the draft, then render only the approved version. Its useful trick is <strong>VideoJSON</strong>—a portable representation that can move between authoring, preview, editing, and rendering without being rebuilt for each step.</p>

<p>This guide is the lean version of that system. It is aimed at small product teams, agencies, and makers who want useful video automation without quietly building a black box.</p>

<p><img src="/assets/img/posts/2026-09-09-how-to-build-an-approval-ready-ai-video-workflow-with-videojson/image-01-81d90d875349.webp" alt="Inspection board for an AI-generated video draft" /></p>

<h2 id="start-with-a-narrow-video-contract">Start With a Narrow Video Contract</h2>

<p>Do not ask an agent to ‘make a compelling launch video.’ That request hides every decision that later becomes expensive. Give it a bounded job instead: duration, aspect ratio, approved assets, scene count, copy limits, CTA, and what it must not alter. For a product clip, that might mean 12 seconds, vertical 1080×1920, three product images, one benefit per scene, and a final URL card.</p>

<p>Use the contract to produce a draft in VideoJSON or build the same structure through <a href="https://videoflow.dev/core">VideoFlow Core</a>. Core is a TypeScript builder that compiles layers, timing, effects, captions, and transitions into the portable format. That is the important handoff: the agent can suggest structured scenes, while your application still owns the allowed schema, assets, and render rules.</p>

<p>A good contract also separates facts from creative choices. Product title, price, and approved claims should come from your catalog or CMS. Hook wording, scene order, and motion can be proposed by the agent. That split makes it much easier to audit why a video says what it says.</p>

<p>For a catalog-scale example, see <a href="https://how-to-blog.gitlab.io/2026/09/07/how-to-build-a-reviewable-product-video-queue-from-catalog-data/">how to build a reviewable product video queue from catalog data</a>. The same principle applies whether the source is a product feed, CRM event, or weekly metrics report.</p>

<h2 id="make-videojson-the-checkpoint-not-the-mp4">Make VideoJSON the Checkpoint, Not the MP4</h2>

<p>An MP4 is a delivery format. It is a poor place to negotiate a change. Treat VideoJSON as the reviewable draft instead. Store it with a template version, source-data version, asset references, and a status such as <code class="language-plaintext highlighter-rouge">draft</code>, <code class="language-plaintext highlighter-rouge">needs-review</code>, or <code class="language-plaintext highlighter-rouge">approved</code>.</p>

<p>That gives reviewers concrete questions: Is this the right product image? Does the price match? Does the disclaimer fit? Is the CTA in the allowed wording? It also makes revision cheap: change a scene object, preview again, and render later. You do not need to reverse-engineer a finished file.</p>

<p><img src="/assets/img/posts/2026-09-09-how-to-build-an-approval-ready-ai-video-workflow-with-videojson/image-02-a0a298b7bdcb.webp" alt="Portable video workflow from source data through preview" /></p>

<p>VideoFlow’s <a href="https://videoflow.dev/renderers">DOM renderer</a> is useful here because the same JSON can become a live, scrubbable preview in your app. The reviewer gets a frame-accurate visual check, rather than guessing from a payload. If you need a fuller editing surface, the <a href="https://videoflow.dev/react-video-editor">React video editor</a> can expose a multi-track timeline, type-aware controls, keyframes, and export while your app persists the edited JSON.</p>

<p>This is also why a structured draft is friendlier to AI systems than a traditional timeline. An agent has a defined output target. Your validator can reject a missing asset, too-long caption, unknown transition, or an unapproved claim before it reaches a human.</p>

<h2 id="put-validation-before-rendering">Put Validation Before Rendering</h2>

<p>Rendering is where queue time and compute spend start to matter. Run a simple preflight first:</p>

<ul>
  <li>Validate the VideoJSON against the template and schema.</li>
  <li>Confirm every media URL is approved and resolvable.</li>
  <li>Enforce duration, aspect ratio, caption length, and safe-area rules.</li>
  <li>Compare any product facts against the current source record.</li>
  <li>Require a human approval state before a production job is dispatched.</li>
</ul>

<p>Keep the validator boring. A handful of explicit rules beats a clever agent that sometimes ships an incorrect price. This is especially important when you generate many variants. A recent guide on <a href="https://the-lean-ecommerce.gitlab.io/2026/09/08/i-turn-one-product-launch-brief-into-five-video-jobs/">turning one launch brief into five video jobs</a> shows why each variant needs one clear job; validation ensures those jobs do not drift into five unrelated messages.</p>

<h2 id="render-where-the-work-belongs">Render Where the Work Belongs</h2>

<p>After approval, choose the renderer based on the job rather than habit. VideoFlow can use the same VideoJSON in a browser, on a server, or as the live DOM preview. Browser rendering can be a sensible option for a small user-initiated export where avoiding an upload is valuable. Server rendering makes more sense for scheduled jobs, APIs, batch queues, and heavier exports.</p>

<p>Make render status visible: queued, rendering, completed, failed. Keep the approved JSON next to the resulting MP4 and record the renderer, template version, and source-data version. When someone asks why a clip changed, you will have an answer that is better than ‘the automation ran again.’</p>

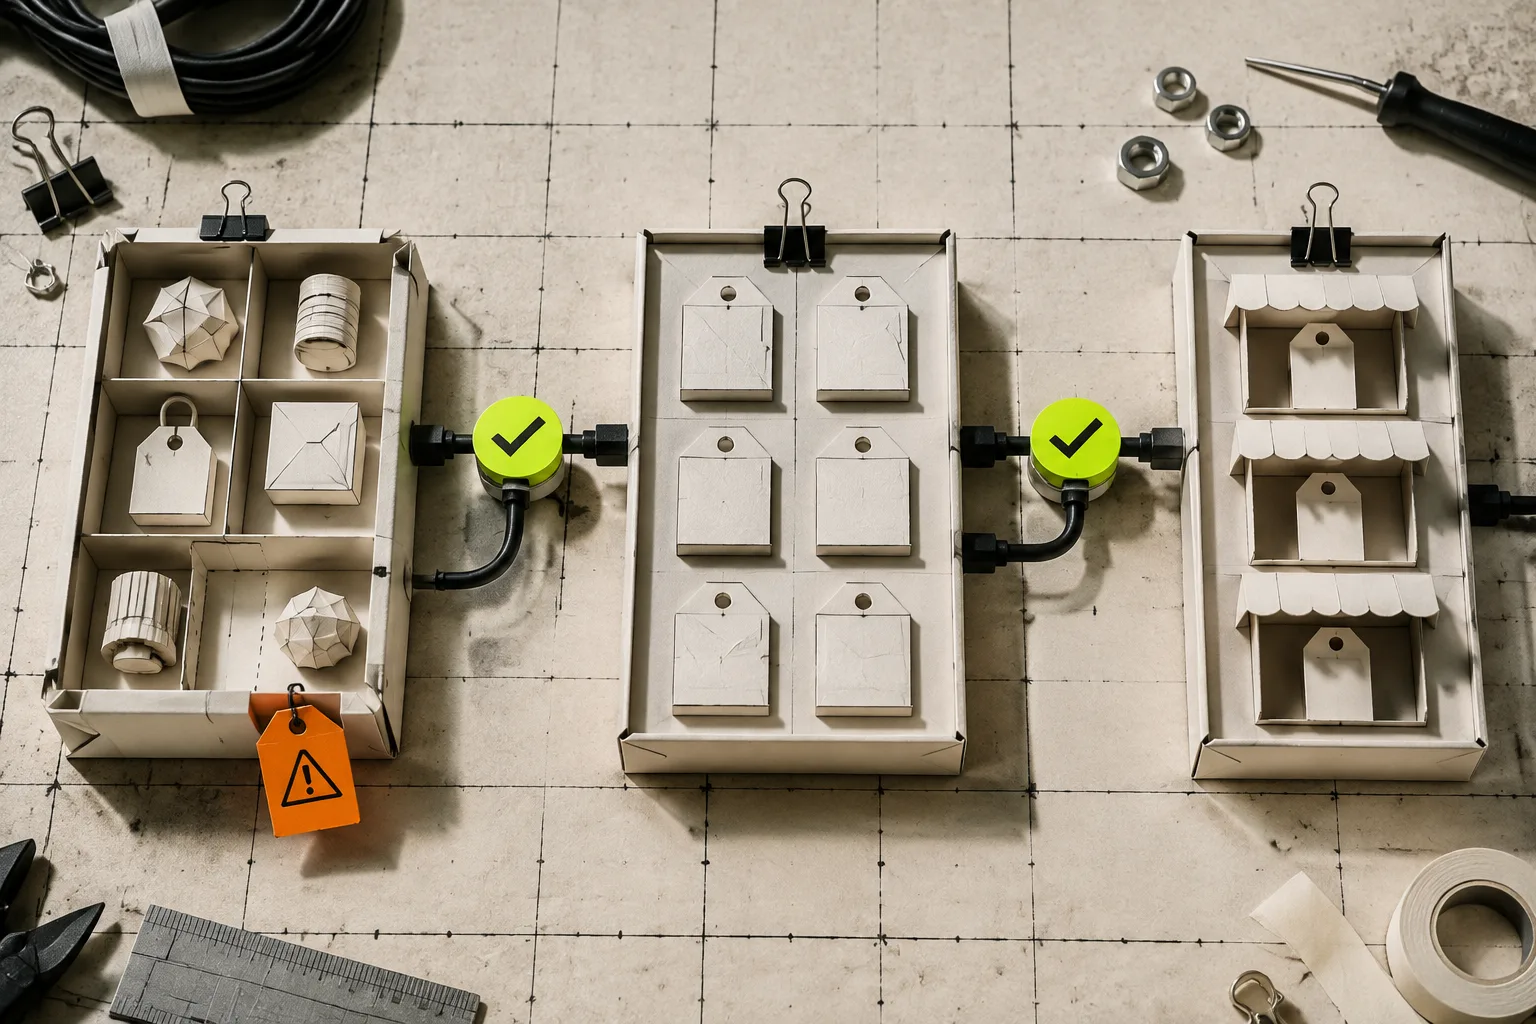
<p><img src="/assets/img/posts/2026-09-09-how-to-build-an-approval-ready-ai-video-workflow-with-videojson/image-03-6f59fe00d668.webp" alt="Approved video cards dispatching to a controlled render queue" /></p>

<p>For creative testing, this discipline keeps the test meaningful. If you are exploring hooks, <a href="https://how-to-blog.gitlab.io/2026/09/04/how-to-test-shopify-ugc-ad-hooks-before-you-commit-to-a-shoot/">test Shopify UGC ad hooks before committing to a shoot</a> as separate controlled variants—not as a single vague request that changes the hook, product image, voice, and CTA all at once.</p>

<h2 id="a-small-workflow-worth-shipping">A Small Workflow Worth Shipping</h2>

<p>Start with one template and one trigger. For example, when a product manager marks a launch brief ready, generate three VideoJSON drafts: feature, comparison, and reminder. Validate the drafts, show a preview, approve one, then render it through the server queue. Save the JSON and the final file together.</p>

<p>That first version is enough to prove the system. Once it is steady, you can add localization, CRM personalization, batch generation, or an embedded editor. If you need a deeper queue pattern, <a href="https://how-to-blog.gitlab.io/2026/09/06/how-to-build-a-reviewable-product-video-queue-with-videojson/">this reviewable VideoJSON guide</a> is a useful next read.</p>

<p>The practical next step is simple: take one video that your team repeats every month, write its constraints as a small template contract, and make VideoJSON the artifact that gets reviewed. Try <a href="https://videoflow.dev/">VideoFlow</a> when you are ready to turn that approved draft into a portable preview, editor, and render pipeline.</p>]]></content><author><name>Tools and How Tos</name></author><category term="tools" /><category term="how-to" /><category term="ai-video" /><category term="video-automation" /><category term="typescript" /><category term="developer-tools" /><summary type="html"><![CDATA[A practical workflow for turning AI video drafts into reviewable VideoJSON, live previews, and safe renders with VideoFlow.]]></summary><media:thumbnail xmlns:media="http://search.yahoo.com/mrss/" url="https://tools-and-how-tos.github.io/assets/img/posts/2026-09-09-how-to-build-an-approval-ready-ai-video-workflow-with-videojson/cover-4e563c9dbe62.webp" /><media:content medium="image" url="https://tools-and-how-tos.github.io/assets/img/posts/2026-09-09-how-to-build-an-approval-ready-ai-video-workflow-with-videojson/cover-4e563c9dbe62.webp" xmlns:media="http://search.yahoo.com/mrss/" /></entry><entry><title type="html">Shopify Bulk Price Changes: A Safer Preflight Checklist</title><link href="https://tools-and-how-tos.github.io/2026/09/08/shopify-bulk-price-changes-a-safer-preflight-checklist/" rel="alternate" type="text/html" title="Shopify Bulk Price Changes: A Safer Preflight Checklist" /><published>2026-09-08T18:37:07+00:00</published><updated>2026-09-08T18:37:07+00:00</updated><id>https://tools-and-how-tos.github.io/2026/09/08/shopify-bulk-price-changes-a-safer-preflight-checklist</id><content type="html" xml:base="https://tools-and-how-tos.github.io/2026/09/08/shopify-bulk-price-changes-a-safer-preflight-checklist/"><![CDATA[<p>You do not need a heroic spreadsheet to change 400 Shopify prices. You need a repeatable preflight: decide the exact set of products, make one narrowly defined change, check the result, and only then run it. That sounds obvious until a sale deadline turns <code class="language-plaintext highlighter-rouge">all active products</code> into the most expensive three words in the shop.</p>

<p><a href="https://apps.shopify.com/ultimate-bulk-editor">Ultimator Bulk Editor</a> is built for this kind of work. Its task flow is simple: choose products or variants with search criteria, define the update, then run it immediately or schedule it. The useful part is not merely that it can update a lot of records; it can edit product and variant fields—including price, compare-at price, inventory, tags, SKU, metafields, SEO fields, and more—without making the spreadsheet your control plane.</p>

<p><img src="/assets/img/posts/2026-09-08-shopify-bulk-price-changes-a-safer-preflight-checklist/image-01-073d24546c7b.webp" alt="A product-selection workbench with checklist materials" /></p>

<h2 id="1-write-the-change-in-one-sentence">1. Write the change in one sentence</h2>

<p>Before opening a bulk editor, describe the operation as if you had to hand it to a teammate: <em>Reduce the summer collection’s variant prices by 15%, excluding gift cards and products already marked down.</em> If that sentence has exceptions you cannot express clearly, the task is not ready.</p>

<p>This step catches a common failure: confusing an intended merchandising group with whatever happens to be visible in the Shopify admin today. Put the decision criteria somewhere durable: collection, tag, product type, vendor, SKU pattern, status, or a combination. A clean selector is also why a <a href="https://the-lean-ecommerce.github.io/2026/09/02/how-i-run-safe-shopify-bulk-updates-without-spreadsheet-roulette/">safe Shopify bulk-update routine</a> starts before the edit itself.</p>

<p>For price work, answer four small questions:</p>

<ul>
  <li>Are you changing products, variants, or both?</li>
  <li>Is the change a fixed amount, a percentage, or a new price?</li>
  <li>Should prices be rounded after the change?</li>
  <li>What must explicitly stay out of scope?</li>
</ul>

<p>Ultimator supports price updates by setting a value, increasing or decreasing by amount or percentage, and rounding cents. That range is convenient, but it makes precision more important: select one operation, document it, and resist adding cleanup edits to the same task.</p>

<h2 id="2-test-the-selector-on-a-small-recognizable-set">2. Test the selector on a small, recognizable set</h2>

<p>Start with a tight filter that returns a handful of products you know well. Look at titles, SKUs, option values, and current prices. Then widen it in deliberate steps. The purpose is not to admire a large count; it is to prove that the count contains the right records.</p>

<p>If variants carry the sellable prices, inspect variants—not just parent products. A product can look correctly selected while one size or color has a different price, barcode, or inventory rule. The same distinction matters when you are preparing a campaign: <a href="https://outils-et-tutoriels.github.io/2026/09/08/comment-choisir-entre-variantes-et-produits-lies-avec-des-nuanciers-sh/">color swatches and linked products</a> can make a collection look simple while the catalog structure is not.</p>

<p><img src="/assets/img/posts/2026-09-08-shopify-bulk-price-changes-a-safer-preflight-checklist/image-02-6f3db885ac5b.webp" alt="A mechanical preview station with retail boxes and verification markers" /></p>

<h2 id="3-preview-the-arithmetic-before-you-commit">3. Preview the arithmetic before you commit</h2>

<p>For a percentage change, sample a few low-, middle-, and high-priced variants. Calculate the expected result separately, then compare it with the proposed operation. Decide how to handle cents <em>before</em> the update: a 15% reduction that leaves <code class="language-plaintext highlighter-rouge">34.423</code> is not a customer-facing price strategy.</p>

<p>Also check the relationship between price and compare-at price. A price change can make a previous compare-at value misleading or flip the visual logic of a promotion. Ultimator can update both fields, but combining them is a reason to slow down, not rush. Capture the intended before/after rule in the task notes.</p>

<p>This is also the moment to inspect your storefront presentation. If a sale includes product imagery or campaign assets, a lightweight <a href="https://the-lean-ecommerce.github.io/2026/09/08/how-i-remove-hidden-metadata-from-shopify-product-images-before-sharin/">image metadata preflight</a> keeps sharing work separate from catalog edits. Different jobs, different rollback paths.</p>

<h2 id="4-separate-immediate-corrections-from-scheduled-launches">4. Separate immediate corrections from scheduled launches</h2>

<p>Run an immediate task when the correction needs to be visible now and you can verify it right away. Schedule a task when it belongs to a launch window, sale start, or coordinated campaign. Both choices are available in Ultimator, but a scheduled task needs an extra checkpoint: confirm the storefront time zone and decide who will inspect the first live result.</p>

<p>Do not schedule a broad price change and treat the timestamp as the approval. Put a calendar reminder just after the run time, open a few representative product pages, and check search or collection views. If the campaign includes content, a <a href="https://how-to-blog.gitlab.io/2026/09/08/how-to-build-a-shopify-blog-review-queue-that-still-publishes/">reviewable Shopify blog queue</a> is a good companion pattern: preparation and publication are separate, observable stages.</p>

<p><img src="/assets/img/posts/2026-09-08-shopify-bulk-price-changes-a-safer-preflight-checklist/image-03-3d88d2fd79da.webp" alt="A scheduling workbench with timer, clipboard, and orange warning marker" /></p>

<h2 id="5-use-one-task-per-reversible-intention">5. Use one task per reversible intention</h2>

<p>A bulk editor is safest when each task has one clear purpose: change a price rule, add a campaign tag, set a product status, or update a metafield. Avoid a mega-task that changes titles, inventory, tags, and prices because they all happen to be on the same launch checklist. When a result looks wrong, single-purpose tasks are easier to diagnose and repeat.</p>

<p>That discipline matters beyond price updates. For example, if the work is making products more discoverable by color, treat <a href="https://herramientas-y-tutoriales.github.io/2026/09/07/como-mostrar-muestras-de-color-en-colecciones-de-shopify-sin-tocar-el/">swatch configuration</a> as its own controlled change rather than an afterthought in a sale edit.</p>

<h2 id="the-five-minute-post-run-check">The five-minute post-run check</h2>

<p>Once the task runs, verify more than the completion message:</p>

<ul>
  <li>Open three products from the intended set and one from an excluded set.</li>
  <li>Check variant-level prices where applicable.</li>
  <li>Confirm compare-at values display as intended.</li>
  <li>Search or browse the affected collection as a shopper would.</li>
  <li>Record the task name, rule, run time, and reviewer in your operating notes.</li>
</ul>

<p><img src="/assets/img/posts/2026-09-08-shopify-bulk-price-changes-a-safer-preflight-checklist/image-04-4d23813bd186.webp" alt="A durable launch checklist tray with inspection card and technical tools" /></p>

<p>The real win from a bulk editor is not raw speed. It is being able to make a catalog change with a clear selection rule, a previewable operation, and a reviewable outcome. If your next price update still starts in a copied CSV, try building the task in <a href="https://apps.shopify.com/ultimate-bulk-editor">Ultimator Bulk Editor</a> instead. Start with one small segment, verify it end to end, and then scale the same method to the rest of the catalog.</p>]]></content><author><name>Tools and How Tos</name></author><category term="tools" /><category term="how-to" /><category term="shopify" /><category term="bulk-editing" /><category term="ecommerce" /><category term="product-operations" /><summary type="html"><![CDATA[A practical checklist for selecting Shopify products, previewing bulk price edits, and scheduling changes without spreadsheet roulette.]]></summary><media:thumbnail xmlns:media="http://search.yahoo.com/mrss/" url="https://tools-and-how-tos.github.io/assets/img/posts/2026-09-08-shopify-bulk-price-changes-a-safer-preflight-checklist/cover-626485a204f4.webp" /><media:content medium="image" url="https://tools-and-how-tos.github.io/assets/img/posts/2026-09-08-shopify-bulk-price-changes-a-safer-preflight-checklist/cover-626485a204f4.webp" xmlns:media="http://search.yahoo.com/mrss/" /></entry><entry><title type="html">Webflow Redesign Backup Checklist: Export Static Pages Before You Change Anything</title><link href="https://tools-and-how-tos.github.io/2026/09/08/webflow-redesign-backup-checklist-export-static-pages-before-you-chang/" rel="alternate" type="text/html" title="Webflow Redesign Backup Checklist: Export Static Pages Before You Change Anything" /><published>2026-09-08T14:36:22+00:00</published><updated>2026-09-08T14:36:22+00:00</updated><id>https://tools-and-how-tos.github.io/2026/09/08/webflow-redesign-backup-checklist-export-static-pages-before-you-chang</id><content type="html" xml:base="https://tools-and-how-tos.github.io/2026/09/08/webflow-redesign-backup-checklist-export-static-pages-before-you-chang/"><![CDATA[<p>Your Webflow redesign is most likely to break in the places nobody put on the moodboard: an old CMS route, a lazy-loaded image, an abandoned redirect that still brings in leads, or a script wired to a form. Before changing the design, make a working static copy of the site you actually have. It is the fastest way to preserve a rollback point, hand a clean reference to a developer, and see what the new build must keep.</p>

<p><img src="/assets/img/posts/2026-09-08-webflow-redesign-backup-checklist-export-static-pages-before-you-chang/image-01-7f65dfc118f5.webp" alt="Webflow static backup field kit on an industrial workbench" /></p>

<h2 id="the-backup-is-not-a-screenshot-folder">The backup is not a screenshot folder</h2>

<p>A browser bookmark and a ZIP of random image files are not enough. A useful Webflow redesign backup needs the pages visitors can reach, the CSS and JavaScript that make them work, fonts and media, and the routes created by your CMS. You also need a record of what should happen after the redesign: forms, metadata, canonical URLs, redirects, and responsive behavior.</p>

<p>That is why a generic downloader can be frustrating with a modern site builder. It may capture one page while missing dynamic routes, assets requested later by the browser, or interactions that only appear after the page loads. Use a platform-aware exporter instead. <a href="https://exflow.site/webflow">ExFlow’s Webflow exporter</a> is designed to turn a published Webflow site into static HTML, CSS, JavaScript, images, and CMS pages you can download as a ZIP or send to Git, S3, FTP, or managed static hosting.</p>

<h2 id="a-webflow-redesign-backup-checklist">A Webflow redesign backup checklist</h2>

<p>Treat this as a short field exercise. The aim is not to perfect the old site; it is to preserve enough evidence that the new site does not accidentally delete useful work.</p>

<h3 id="1-inventory-the-routes-worth-saving">1. Inventory the routes worth saving</h3>

<p>Start with a list of your important URLs: home, services, pricing, contact, legal pages, and a few high-value CMS items such as blog posts, case studies, or locations. Add any campaign landing pages that still receive traffic. This list becomes your post-redesign smoke test.</p>

<p>If your redesign is high risk, make the backup before the first layout change—not the afternoon before launch. <a href="https://the-lean-ecommerce.github.io/2026/09/04/how-i-put-a-webflow-site-in-git-before-a-high-risk-launch/">How I Put a Webflow Site in Git Before a High-Risk Launch</a> is a useful companion when you want the backup to become a versioned handoff rather than a one-off archive.</p>

<p><img src="/assets/img/posts/2026-09-08-webflow-redesign-backup-checklist-export-static-pages-before-you-chang/image-02-03fd3b79184a.webp" alt="Checklist for preserving Webflow routes and assets" /></p>

<h3 id="2-export-the-published-site-not-an-unfinished-draft">2. Export the published site, not an unfinished draft</h3>

<p>Enter the published site URL in ExFlow and configure the export for the pages you need. The practical target is a static package containing the page files plus stylesheets, scripts, images, media, and CMS-derived pages. If your host expects explicit page files, enable <code class="language-plaintext highlighter-rouge">.html</code> extensions where appropriate.</p>

<p>Keep the original output untouched. Give it a date and store it as the known-good reference. Then make a second working copy for any experiments. This small separation prevents a surprisingly common mistake: editing the only rollback artifact while trying to prepare the redesign.</p>

<p>For a more detailed pre-redesign perspective, see <a href="https://how-to-blog.gitlab.io/2026/09/01/how-to-export-a-webflow-site-before-a-redesign/">How to Export a Webflow Site Before a Redesign</a>.</p>

<h3 id="3-check-the-assets-webflow-visitors-actually-use">3. Check the assets Webflow visitors actually use</h3>

<p>Open the exported site locally or on a private static preview. Click through the route inventory and check: images, videos, fonts, navigation, internal links, page titles, descriptions, forms, scripts, interactions, and the small-screen layouts that often expose missing CSS. Do not assume a green export status means every browser request succeeded.</p>

<p>Pay special attention to CMS templates. Test several entries, including an old one with unusual formatting and a recent one with a large image. That gives you a better signal than checking a single perfect-looking page. If your site is content-heavy, <a href="https://the-lean-ecommerce.github.io/2026/08/23/how-i-build-a-webflow-static-mirror-before-a-redesign/">How I Build a Webflow Static Mirror Before a Redesign</a> shows why the mirror should be treated as a reviewable deployment, not just a download.</p>

<p><img src="/assets/img/posts/2026-09-08-webflow-redesign-backup-checklist-export-static-pages-before-you-chang/image-03-59aa57da6817.webp" alt="Technical kit for a Webflow redesign backup" /></p>

<h3 id="4-choose-the-backups-job-before-choosing-hosting">4. Choose the backup’s job before choosing hosting</h3>

<p>A ZIP is enough for an offline archive or client handoff. Syncing to Git is better when the redesign team needs a reviewable history. S3 or FTP can suit an existing infrastructure, while a static host is often simpler for a private staging copy. ExFlow can deploy or sync the exported output to Git, S3, FTP, or ExFlow Hosting, so the export does not need to become a manual file-moving exercise.</p>

<p>The decision is less about the trendiest host and more about recovery time. Ask one direct question: if the redesign is rolled back tomorrow, can the team find this copy and put it online without rebuilding it?</p>

<h3 id="5-run-a-last-boring-qa-pass">5. Run a last, boring QA pass</h3>

<p>Before signing off, compare the static copy with the live site on desktop and mobile. Check the URL list, inspect image-heavy pages, submit a test form only where it is safe to do so, and confirm that redirects and metadata are documented for the new build. Capture any intentional differences so nobody later mistakes them for regressions.</p>

<p><img src="/assets/img/posts/2026-09-08-webflow-redesign-backup-checklist-export-static-pages-before-you-chang/image-04-fbfe3dfaf115.webp" alt="Static site deployment and quality assurance tools" /></p>

<p>A static copy will not recreate every server-side feature, so flag integrations that need their own migration plan. That caveat is a feature of the exercise: it turns hidden dependencies into a visible launch checklist. For the full export-and-cutover sequence, <a href="https://the-lean-ecommerce.github.io/2026/08/11/webflow-static-site-cutover-my-export-deploy-and-qa-runbook/">Webflow Static Site Cutover: My Export, Deploy, and QA Runbook</a> is worth keeping beside the backup.</p>

<h2 id="make-the-rollback-point-before-the-redesign-gets-interesting">Make the rollback point before the redesign gets interesting</h2>

<p>The best time to test your Webflow exit path is while you still like the current site. Export a static copy, validate a short route list, and store it somewhere the team can actually retrieve. Start with <a href="https://exflow.site/webflow">ExFlow’s Webflow exporter</a>, then make that archive the first item in your redesign brief.</p>

<p>ExFlow also has dedicated exporters for <a href="https://exflow.site/squarespace">Squarespace</a> and <a href="https://exflow.site/framer">Framer</a>, but keep this backup platform-specific: Webflow’s routes, interactions, and CMS content deserve their own check.</p>]]></content><author><name>Tools and How Tos</name></author><category term="tools" /><category term="how-to" /><category term="webflow" /><category term="website-backup" /><category term="static-hosting" /><category term="site-migration" /><category term="exflow" /><summary type="html"><![CDATA[A practical Webflow redesign backup checklist: export static pages, media, and CMS routes, then test the copy before your next launch.]]></summary><media:thumbnail xmlns:media="http://search.yahoo.com/mrss/" url="https://tools-and-how-tos.github.io/assets/img/posts/2026-09-08-webflow-redesign-backup-checklist-export-static-pages-before-you-chang/cover-7f65dfc118f5.webp" /><media:content medium="image" url="https://tools-and-how-tos.github.io/assets/img/posts/2026-09-08-webflow-redesign-backup-checklist-export-static-pages-before-you-chang/cover-7f65dfc118f5.webp" xmlns:media="http://search.yahoo.com/mrss/" /></entry><entry><title type="html">How to Audit an Etsy Product Feed Before a Seasonal Sale</title><link href="https://tools-and-how-tos.github.io/2026/09/07/how-to-audit-an-etsy-product-feed-before-a-seasonal-sale/" rel="alternate" type="text/html" title="How to Audit an Etsy Product Feed Before a Seasonal Sale" /><published>2026-09-07T16:37:07+00:00</published><updated>2026-09-07T16:37:07+00:00</updated><id>https://tools-and-how-tos.github.io/2026/09/07/how-to-audit-an-etsy-product-feed-before-a-seasonal-sale</id><content type="html" xml:base="https://tools-and-how-tos.github.io/2026/09/07/how-to-audit-an-etsy-product-feed-before-a-seasonal-sale/"><![CDATA[<p>If a seasonal sale is coming, your product feed is probably not the first thing on your list. It should be. A broken feed can leave new listings out of your catalog, show yesterday’s price, or make a product impossible to tag just when a post starts getting attention.</p>

<p>The useful mental model is simple: your Etsy listings are the source of truth; the catalog is a copy that a social-shopping system reads on a schedule. Treat that copy like any other dependency. Check it before you need it.</p>

<p><a href="https://catalog-generator.webyze.com/">Catalog Generator for Etsy</a> gives an Etsy shop a feed URL that can be used as a data source for a catalog, so you are not exporting and uploading a new file every time a listing changes. The app has a seven-day free trial and then costs $5 per month, which makes it sensible for a shop that is already getting real use from product tagging.</p>

<p><img src="/assets/img/posts/2026-09-07-how-to-audit-an-etsy-product-feed-before-a-seasonal-sale/image-01-cd319dbefd9b.webp" alt="Etsy listing data moving through catalog feed checks" /></p>

<h2 id="start-with-the-listings-not-the-feed">Start With the Listings, Not the Feed</h2>

<p>A feed cannot repair messy listing data. Before changing anything in Meta Business Manager, make a short change list: products being added, products being retired, new variations, price changes, and image swaps. Then open a few listings on Etsy as a buyer would. Check that the product title distinguishes the item, the lead image actually represents the selectable variation, the price is current, and inactive listings are not the ones you plan to promote.</p>

<p>This is especially important if you have done a batch update. If you are changing a sale price, tags, or variations across a collection, use a controlled batch rather than editing at random and hoping the catalog catches up. <a href="https://how-to-blog.gitlab.io/2026/05/22/how-to-bulk-edit-etsy-listings-without-spreadsheet-chaos/">This Etsy bulk-editing guide</a> is a good companion: it separates the work that belongs in a repeatable edit from the work that needs an individual decision.</p>

<p><img src="/assets/img/posts/2026-09-07-how-to-audit-an-etsy-product-feed-before-a-seasonal-sale/image-02-1c4eb5e8aedb.webp" alt="Seasonal Etsy listing update preparation tray" /></p>

<h2 id="check-the-data-source-configuration">Check the Data Source Configuration</h2>

<p>In Meta Commerce Manager, confirm that the catalog is using the feed URL—not a one-off spreadsheet from last season. The point of a feed is that the catalog can retrieve the current listings repeatedly. Catalog Generator’s setup flow provides that URL after you connect the Etsy shop; paste it into the catalog’s data-source setup and choose a refresh schedule that matches how often you make meaningful changes.</p>

<p>Do not make the schedule faster just because you can. Daily is usually plenty for a small shop with planned updates. More important: know when the last refresh completed and whether it surfaced errors. If you are setting this up for the first time, the product’s <a href="https://www.youtube.com/watch?v=2ChLE92Cu4s">step-by-step walkthrough</a> shows the domain-verification and data-source sequence.</p>

<p>There is one unglamorous prerequisite: the Etsy shop domain must be verified in the business settings before product tagging can work cleanly. Do that before launch week. A pending domain approval is not a fun thing to discover after you have scheduled a product post.</p>

<h2 id="run-a-small-deliberate-test">Run a Small, Deliberate Test</h2>

<p>Pick three listings that represent risk: one old bestseller, one new seasonal item, and one listing with variations. Find each in the catalog after its next refresh. Then compare four things against Etsy: availability, price, primary image, and destination link. You are not trying to prove that every row is perfect; you are looking for a pattern that says the connection is healthy.</p>

<p>If anything is missing, resist the urge to rebuild the entire catalog. First check whether the Etsy listing is active and complete. Then check the feed’s refresh status and its item diagnostics. Only change one variable at a time, refresh, and retest the same three products. That makes the failure legible.</p>

<p>For a deeper feed-specific checklist, keep <a href="https://how-to.the-lean-ecommerce.com/2026/08/17/how-to-check-your-etsy-product-feed-before-you-connect-instagram/">this guide to checking an Etsy product feed before connecting Instagram</a> nearby. It is more useful than guessing from a blank product-tag picker.</p>

<p><img src="/assets/img/posts/2026-09-07-how-to-audit-an-etsy-product-feed-before-a-seasonal-sale/image-03-08e85a03945f.webp" alt="Ecommerce catalog launch verification kit" /></p>

<h2 id="make-the-feed-part-of-your-sale-checklist">Make the Feed Part of Your Sale Checklist</h2>

<p>Add one line to the launch checklist: “Catalog refreshed; three listings verified.” Put it after listings are final and before social posts are scheduled. This tiny gate avoids the familiar failure mode where marketing is ready but the product tag points nowhere useful.</p>

<p>Also separate feed changes from creative changes. A new Instagram image can be scheduled independently; a new product or variation needs enough lead time to appear in the catalog. That distinction matters when a launch becomes hurried. If you need to clean up many Etsy listings before the sale, <a href="https://productivity-tech-business.blogspot.com/2026/07/how-to-batch-update-etsy-listings.html">this safer bulk-editing workflow</a> can help you make the source data boring and predictable first.</p>

<p>The payoff is not fancy automation. It is confidence that the item you are showing is the item a customer can actually buy. Start by opening your catalog today, choose three representative Etsy listings, and compare them to the source. If the connection is sound, use <a href="https://catalog-generator.webyze.com/">Catalog Generator for Etsy</a> to keep that feed URL working in the background instead of returning to manual uploads before every campaign.</p>]]></content><author><name>Tools and How Tos</name></author><category term="tools" /><category term="how-to" /><category term="etsy" /><category term="product-feed" /><category term="instagram-shopping" /><category term="facebook-shops" /><category term="seasonal-sale" /><summary type="html"><![CDATA[A practical preflight for checking an Etsy catalog feed before you rely on it in Instagram and Facebook Shops.]]></summary><media:thumbnail xmlns:media="http://search.yahoo.com/mrss/" url="https://tools-and-how-tos.github.io/assets/img/posts/2026-09-07-how-to-audit-an-etsy-product-feed-before-a-seasonal-sale/cover-3c9c901619bb.webp" /><media:content medium="image" url="https://tools-and-how-tos.github.io/assets/img/posts/2026-09-07-how-to-audit-an-etsy-product-feed-before-a-seasonal-sale/cover-3c9c901619bb.webp" xmlns:media="http://search.yahoo.com/mrss/" /></entry><entry><title type="html">A Practical Checklist for Choosing an Online Tool Before You Pay</title><link href="https://tools-and-how-tos.github.io/2026/09/06/a-practical-checklist-for-choosing-an-online-tool-before-you-pay/" rel="alternate" type="text/html" title="A Practical Checklist for Choosing an Online Tool Before You Pay" /><published>2026-09-06T20:05:52+00:00</published><updated>2026-09-06T20:05:52+00:00</updated><id>https://tools-and-how-tos.github.io/2026/09/06/a-practical-checklist-for-choosing-an-online-tool-before-you-pay</id><content type="html" xml:base="https://tools-and-how-tos.github.io/2026/09/06/a-practical-checklist-for-choosing-an-online-tool-before-you-pay/"><![CDATA[<h2 id="start-with-the-job">Start with the job</h2>

<p>Choose from a real task, not a category. Write the moment you want to improve in one sentence.</p>

<p><img src="/assets/img/posts/2026-09-06-a-practical-checklist-for-choosing-an-online-tool-before-you-pay/image-01-97cf7d99a64e.webp" alt="Comparison desk" /></p>

<h2 id="compare-the-essentials">Compare the essentials</h2>

<p>Record the first useful result, the collaborators, the data involved, and the realistic cost.</p>

<p><img src="/assets/img/posts/2026-09-06-a-practical-checklist-for-choosing-an-online-tool-before-you-pay/image-02-76d43f59736a.webp" alt="Tools and How Tos mark" /></p>

<h2 id="try-real-work">Try real work</h2>

<p>Use one real project. If you cannot repeat the work or export it cleanly, the trial has answered the question.</p>

<p><img src="/assets/img/posts/2026-09-06-a-practical-checklist-for-choosing-an-online-tool-before-you-pay/image-03-76d43f59736a.webp" alt="Tools and How Tos social card" /></p>

<p>Keep the tools that create momentum, not administration.</p>]]></content><author><name>Tools and How Tos</name></author><category term="tools" /><category term="how-to" /><category term="online-tools" /><category term="software-selection" /><summary type="html"><![CDATA[A calm way to compare online tools before a free trial becomes another unused subscription.]]></summary><media:thumbnail xmlns:media="http://search.yahoo.com/mrss/" url="https://tools-and-how-tos.github.io/assets/img/posts/2026-09-06-a-practical-checklist-for-choosing-an-online-tool-before-you-pay/cover-97cf7d99a64e.webp" /><media:content medium="image" url="https://tools-and-how-tos.github.io/assets/img/posts/2026-09-06-a-practical-checklist-for-choosing-an-online-tool-before-you-pay/cover-97cf7d99a64e.webp" xmlns:media="http://search.yahoo.com/mrss/" /></entry></feed>